Thursday, September 6, 2012

It's been a few years since I posted on my horn build.  Here's a picture showing the system's progression.

Some notes:

I added a pair of 650 Hz Le Cleac'h horns (turned using the same method as my 320 Hz tractrix horns) loaded with TAD TD-2001 drivers.  I'm crossing over at 2k Hz, which many people advise against, but I haven't found this point to be problematic in my installation, especially with first-order crossovers.

I replaced the JBL 2402 tweeters with Electro-Voice T350s crossed at 10,000 Hz.  These tweeters aren't for people who want sparkling, hissing, highs.  They're smooth, natural, and almost unnoticeable, which I appreciate.

I added a stand for the horns that allow each horn to slide into a time-aligned position.

Next steps:

Adding sealed subwoofers loaded with Aura 1808 drivers.

Building a pair of elliptical 100 Hz hypex full-space upperbass horns.

Wednesday, September 15, 2010

Horns are up

The horns are finished.  Check out the website if you haven't already. All of the content from the blog is organized here, plus some:

http://sites.google.com/site/diyfirefly

Thursday, June 17, 2010

Blog Archive

The blog format made it tough to organize content, so I archived all of my builds on the DIY Firefly website.

Tuesday, June 15, 2010

From this perspective, this horn looks huge (it's not really that big).  I made some more progress on the horn and devised a nice way to attach the driver cabinet to the horn through "wings."  I attached them with Festool Dominos for a really strong link.  This way, the driver chamber is fully detachable from the horn if I ever decide to swap the EV15Ls out for something else.  I took a lot of pictures of the build which I'll post when I get a chance.

Friday, June 4, 2010

100 Hz Conical Horn

After researching mid/upper bass horns for several months, I used Hornresp to model a 100 Hz conical horn for a pair of EV-15Ls I had lying around.  I'm trying to cover 100 Hz to 600 Hz with this horn.  I liked the idea of going with a multi-sided conical.  It should look great with my 320 Hz round tractrix horns. 


Here's a pict of the first cone I glued up.

After I built this horn, I stumbled across Bill Wood's website.  He designs and builds 12-sided conical horns from 300 Hz on up.  He even has some nice throat compression driver adapters.  His horns look great, especially since he's using solid wood (maple and other woods by request).  I used 3/4" Baltic Birch for mine.  He also has his observations and impressions of conical horns, which he prefers to other types of flares (including tractrix and exponential).

I'll post design details this week after I sneak out to CanJam Chicago tomorrow.

Thursday, May 13, 2010

38 Hz Tapped Horns

After building the Buschhorns, I'm back to my front-loaded horn project.  While I decide what to build for mid/upper bass horns, I figured that I'd crank out the 38 Hz tapped horns from Erik's site.


This was a quick job, especially with the Festool rail saw that I borrowed for the task.  I can't speak more highly of this tool...great dust collection, straight and quick cuts with no tear-out.  What more could I ask for?
Next, I cut six 5' strips on the table saw that make up the interior pieces and all of the sides.  I cut one extra just in case of a miscut on the mitre saw.


Here, I'm dry-fitting the box.  As you can see, I biscuited the exterior.  This makes gluing a lot faster and more accurate.  When gluing, the pieces tend to slip a bit if the clamps aren't aligned perfectly, and biscuits, dowels, or dominos help everything line up.  


Everything fit perfectly, and you can see the added bracing in this picture.  

Next step, wiring, installing the binding posts, final gluing and installing the driver.

Thursday, April 29, 2010

Buschhorn Back-Loaded Horns


So, I took break with my front-loaded horn system because the weather is getting too damn nice to not have some sound in my new sunroom.  I had a pair of Fostex 103E drivers sitting around for a while and this seemed to be a perfect opportunity to employ them.  After doing some research, I settled on the Buschhorn, which is less than 7" wide and it's floor-standing, so I wouldn't have to build stands or mount a pair of monitors on the wall somehow.  You can find the plans here.  I'm going to document my build for those of you considering building a pair of back-loaded horns.

I hate veneering, so for this project, I decided on a baltic birch ply look.  It's becoming a theme in the sunroom that started with a step.  I glued up 80 layers of baltic birch, which took way longer than I anticipated.  Looking back, it could have been a lot easier if I used screws for alignment instead of just gluing the pieces.


I ended up using screws and glue on the front top and back panels of the buschhorn.  Once the glue dried, I backed the screws out and repeated with the next layer until I got past the minimum width.


Next step, sanding down flat and smooth...for this step I headed up to Wisconsin to visit my dad's shop. He has really nice tools that I use in times like this.  The surface sander is one of my favorites.  It doesn't gouge like a surface planer does, and you don't have to follow the direction of the grain.


While I was up there, I used the Steel City granite top table saw to cut all of the interior pieces. No tear out with this sucker...just straight smooth cuts.  


Next step was to route out the hole for the FE103 driver.  I used the same router template that I used for my mid-horns, but I had to modify it because the pivot point (screw) falls within the base of the router.  I ended up using two bolts on the far end of the router that I could attach after I connect the circle template to the workpiece.


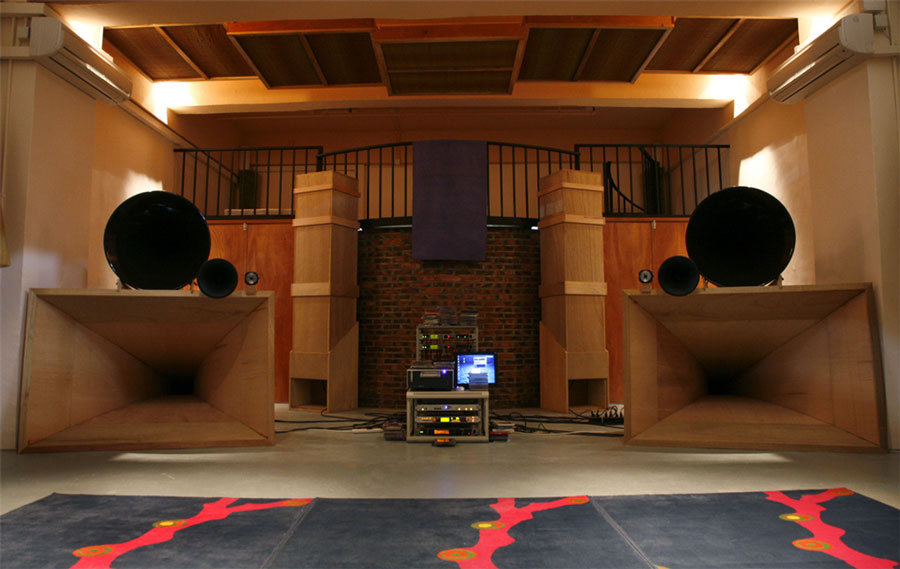
This is how it turned out.

Then I cut all of the inside pieces (this is where I found out that the Buschhorn plans have incomplete information--let me know if you need the missing info).  I glued up all of the pieces of the back-loaded horn and filled the two voids with sand.

All clamps on deck for the final glue-up.


Finished.  I installed speaker grills to keep curious 10 month old hands off the drivers and added bases to keep them vertical.

Thursday, March 18, 2010

DIY Horn Speakers - Twins


TWINS!  I completed the matching horn exactly one month after I finished the first.  Two kids, a full-time job and commute only left me with 30 minutes a day to work on them, so I figure it took me about 15 hours per horn.

Thursday, February 18, 2010

DIY Horn Speakers - Step 11: Finishing


I originally planned to finish the horns with shelac--my finish of choice for just about any wood project.  I tested shelac, and I just didn't like the results.  It darkened the wood to an amber color.  I also tried using wax, and again, I wasn't happy with the darkened wood.  So, I sanded it all back down to 60 and stepped back through the grits to remove all of finish.  Next time, I like to think that I'll test on a scrap piece.  The picture shows my first completed 320 tractrix horn being tested.  To the left of the horn is an Electro-Voice Aristocrat speaker that I built from baltic birch and wenge.

I love the look of the look of the 190 layers of baltic birch, and I now knew that I didn't want to darken the wood, so I decided to try my first ever water-based finish.  I bought a quart and went to work applying three coats with a brush while hand-turning the lathe.  No smell, easy water clean-up, and it turned out great.  I can't say that I'd use the finish on hardwood, but I think it looks spectacular on stacked baltic birch.
Final Assembly:

You can see how the driver mounts to the layer of baltic birch (closest to the throat) that was not glued to the rest of the stack.  I recessed large washers and added lock nuts to mount the compression driver.  Then I mounted the wood mount back onto the horn.
Here you can see how the driver mounts back onto the horn.

I didn't have a crossover to use, so to test my results I just hooked up my spades up to the terminals on the compression driver.  I just played some higher-register music (solo violin) so I wouldn't damage the driver.  It sounded incredible--more detail than anything I've ever heard.  I could even hear Isaac Stern breathing and the sound of his bow rubbing the strings of his Guarnerius.  I can't wait to finish the mid-bass horns and subwoofer and really test this horn out.

Check out the massive JBL 2446 compression driver!


DIY Horn Speakers - Step 10: Sanding


I used a spongy sanding pad and stepped through grits from 60 to 320.  The horn shined up even without a finish.  I read of someone using a paper grocery back to get to 1000 grit.  I tried this, but I can't say that I saw much difference.

DIY Horn Speakers - Step 9: Building the Horn


I just glued the top three layers to the rest of the stack (no screws) because, being thinner, I didn't want to risk punching through a horn wall (especially if that screw traveling at 500 RPM struck my chisel).


Here's what the horn grew up to be, the inside profile complete.


And most importantly, the template fits perfectly!

DIY Horn Speakers - Step 8: Turning the Horn

Knowing nothing about using a lathe before starting this project, I asked a veteran wood turner who I saw at the Marin County farmer's market for some tips.  He imparted some wood-turning wisdom on me and told me NOT to glue the whole stack up, but to glue a few pieces at a time, lathe, then glue onto that.  He was absolutely right.  If you're lathing by hand, it's very difficult to reach way inside the horn mouth with a HSS chisel and lathe with any degree of accuracy.  I stacked the first seven slices and glued all but the one at the very bottom (the throat).  Then, I mounted the stack to a lathe plate with 2 1/2" screws and screwed the whole assembly onto the spindle.  Looking back, I probably should have only glued the four slices and turned that before adding more because the thickness of those seven layers made it difficult to reach way inside with the chisels.  I ended up sanding it down with 60 grit because the flare is very slight with the first few layers.

The process continued like this through all 19 layers--glue, lathe, glue, lathe, glue, lathe.  I used my template while turning, cutting a little at a time, and testing the profile with the template.  At this point, I still have a ways to go as you can see from the length of the template sticking out.

Wednesday, February 17, 2010

DIY Horn Speakers - Step 7: Gluing the Disks


There are several ways to glue a stack of disks.  Erik (from volvotreter) used a 2" rod to center the stack.  I didn't have a 2" rod, and I didn't want to run back out to the hardware store, so I ended up blue taping the exterior edges to center the slices and I drilled eight holes in each layer.  I used 1" screws and offset them between the screws of the previous layer.  They are way over-built, but I figured that this would be the easiest method to glue the stack once it got past the seventh layer and started to flare out, and I wouldn't have a 2" hole in the center of those larger pieces.  I also wouldn't have to even clamp the layers--the screws did a great job squeezing the slices together.  Glue would have certainly held the slices together, but it's always difficult to prevent drift when gluing, so I preferred to use screws.

It's very important that you don't glue the bottom layer by the throat because you will need to mount your compression horn to it and then mount that to layers 2-19 (depending on the thickness of your layers).  In layer 2, you will need to insert some t-nuts that you can insert bolts into from the outside of layer 1.  This way, you can mount the driver to layer 1 (the bolts bolt into the driver from the inside of layer 1), then mount layer 1 into the t-nuts from layer 2.  Be sure that the t-nuts are far enough from the compression driver so that you can tighten them (they should be fairly close to the edge).  The picture on the left comes from volvotreter.

DIY Horn Speakers - Step 6: Time to Make the doughnuts


 Cutting out the centers saves a lot of time at the lathe. I used a 2" fornster bit and used the screw hole from the circle jig as a center.  I cut out seven circles for each horn (up to the point where the the flare begins).  An added bonus--the 2" drill bit was perfectly matched for the 2" compression driver.  For the larger circles for the mouth of the horn, I ended up using the router to cut out the centers.

DIY Horn Speakers - Step 5: Cutting the Disks pt. II

Except for the wider base necessary to mount the driver, I aimed for 2" walls with a width of 1" at the mouth.  I used the printed out tractrix curve and added two inches to the radius, measured from the inside of the router bit, and drilled a hole in my circle jig at that point where the screw is inserted as a pivot point.  You can see my two stacks of 19 circles on the left.  Next step, time to make the doughnuts.

DIY Horn Speakers - Step 4: Cutting the Circles

I determined the width of the horn near the throat by measuring the driver mounting and approximating how wide the base of the horn should be so I would have enough room to mount the compression driver (JBL 2446), and then mount that piece to the rest of the horn through bolts and threaded inserts.  Because of this mounting process, the base of wooden horns should be wider than plastic/metal/fiberglass horns with metal mounts unless you plan to use a special adapter.  The first seven circles of the stack would be the same width.

I've found the best way to cut perfect circles is by using a plunge router mounted to a circle-cutting jig.  There's no need to buy one, a simple scrap of baltic birch or MDF will work well.  Just measure from the inside of the straight router bit to the radius anywhere on the jig and drill a hole the width of a screw.  Drill the screw through your jig and into your baltic birch sheet and you're ready to make perfect circles.  You probably won't be able to cut through the whole piece in one pass.  I took 2-3 passes with the router for each circle.  I cut out 19 pieces per horn, so by the end, the brand new Freud (Italian made) carbide bit was bogging down a bit, requiring more passes.  Whiteside (US made) also makes great bits, and are even higher rated than Freud, although they weren't readily available at the local hardware store when I needed to replace an older bit that wasn't up to the task.


Tip: Save your lungs, use dust collection for this task.  I made my own attachment out of a free conference Nalgene bottle give-away.  It worked really well and collected 99% of the dust.  I probably collected ten gallons of fresh sawdust from the 38 circles that I cut.

Monday, February 15, 2010

DIY Horn Speakers - Step 3: The Plan

Most endeavors start with a plan (some of the best started with a mistake, which is content for a different blog).  In this case, I started with a plan, and Erik (from volvotreter) was invaluable because he has plans on his website.  Imitation is the sincerest form of flattery, so I decided to copy his plans verbatim (with a few tweaks).  I decided to test my lathe out and make the 320 Hz tractrix horns first.  I downloaded this tractrix horn calculator spreadsheet from volvotreter, plugged in a few numbers based on the driver I planned to use (JBL 2446j), and wholla!  Out shot a stream of data points with AutoCAD measurements and dimensions.  AutoCAD would have saved me a lot of time, but since I didn't have a copy, I decided to use the tool that I did have--Adobe Illustrator.  I tried using the automatic graphing feature in Illustrator, but just couldn't make it happen.  It looks to be pretty limited to very basic graphing, but it could have just been operator error.  Luckily, I carpool to work with my brother, so I had some downtime to burn.  Several commutes later, I had a very accurate graphical representation of the inside profile of my to-be-built 320 Hz tractrix contour.  If anyone would like this file (or a PDF of it), let me know, and I'll email it to you.

Update: I located a DIY Audio post appropriately titled "Plotting a curve for a Tractrix Horn in Adobe Illustrator with Javascript."  If you're plotting in Illustrator, this could save you some time, assuming it will work for you.

Tip: I plotted every third data point, which was still overkill when hand-turning.  If you do as I did and plot it in Illustrator, or god help you if you are planning to plot by hand, plot every 5-7 points and round your numbers to something reasonable.  The spreadsheet kicks out mm to the hundredths place.  This level of accuracy will be lost anyway when you hand-turn.  

Next step--cut this illustration into several slices  that are the thickness of my baltic birch sheets (about 15 mm).  It turned out to be just over 19 slices.  In Illustrator, I measured each radius so I could roughly approximate the outside dimensions of the slices to cut out on the router (next step).  Since I don't have a 24" wide printer at home, I printed out two copies at work.  If you don't have access to a wide printer, you could just take the illustration to Kinkos.

I blue taped one of my printouts onto a piece of baltic birch and cut out the profile on my bandsaw. Considering the thickness of the template, I then had to round the corners with a round-over router bit so the round edge would fit into the center of the round horn.

Thursday, February 11, 2010

DIY Horn Speakers - Step 2: Acquiring a lathe


Erik (from volvotreter fame) built his lathe (see picture) from salvaged parts in scrapyards in his area. Wow. I wouldn't even know where to begin the process of building a lathe, so I began my search to buy a lathe where any cheapskate does, on Craigslist. Craigslist cracks me up--actually the people on Craigslist crack me up when they post the same item week after week for months and even years with no buyer and no lowered price. How many re-posts will it take to get $250 for your POS all-in-one JVC stereo from the early 80s? (The one you paid $500 for back then...) I digress, it only took me about a week to find the perfect lathe--one with variable speed and a swinging head (to accommodate the large horns)--a JET 1236.
It was listed for just $200 and only used a handful of times. JET makes some decent equipment, not the best, not the worst, but usually reasonably priced. I sent the seller my phone number and told him that I'd buy it. I got worried when I didn't hear back within the next four hours. I knew this was a good price, and I'm sure he had other emails. I emailed him back and offered $250. He emailed me back within the next few hours, and I picked it up the next morning.

DIY Horn Speakers - Step 1: Research


I've wanted to build a front-loaded horn speakers for a while now, but the low (maybe even negative) WAF factor put the big ixnay on my plans. Moving to a house with a basement reignited my plans--they will be sequestered to the basement and they can be as large as necessary!

What's there not to love about beautiful, large horns loaded with massively heavy compression drivers calling back to the early days of audio? Maybe I'm just a romantic. After hours of researching how to build wood horns and searching Google Images for "wood horn speakers" (audio porn), I found some sites that would help an everyday guy like me understand what it would take to build my own horn system (audioaslylum, diyaudio, edgarhorn (for inspiration), and volvotreter) as well as some oddities and the horn systems that could house a small family.

The best site by far (probably has everything you need) is volvotreter (see image of his system). Erik manages the site, most of which is dedicated to DIY horn systems. He posts all the plans you need and includes a lot of detail. My first project is to replicate his "Current System," consisting of 320Hz tractrix horns, 77Hz mid-bass horns. We'll see what I end up deciding on to complete the low end (below 100Hz). In the next several posts, I will share my experience building the ultimate front-loaded horn speakers. First stop--acquiring a lathe.

Wednesday, February 10, 2010

Welcome to DIY Firefly. This blog focuses on hi-fi audio components that I make from wood in an average basement shop in the Chicago burbs. I intend to provide enough instruction for you to take on these projects yourself, and I will include all the details—pitfalls to avoid, mistakes I made, and time-saving tips.